DIY Pizza Box Easel
Eat, Then Create!

We’re having to get extra creative with the way we do things, from shopping for groceries, to sending out mail, getting exercise, and entertaining the kids.
Our options are limited, yes, but you know what they say, "Restriction Breeds Creativity”.
We’re about to get really creative with… That’s right… A Pizza Box!
We’re going to show you an easy way to DIY that empty box from dinner into an art easel that you and the kids can use for all of the creative activities in your current life!
Follow along with the steps and matching photos below, and you’ll have an art easel in no time!
You can use your DIY art project to make some masterpieces of your own. For canvas paintings, simply sit the canvas on the easel, and for flat artwork like paper projects, use binder clips to secure the paper to the back of the easel.
You and the little ones will have so much fun creating some artwork at home with help of this DIY easel so be sure to check out ALL of the great paintings we’re offering right now!
From take-home paint kits for the kiddos, to virtual art classes for all, we’re still offering the same level of customer service and excellence as we always have.
We’re looking forward to reopening and painting will all of you, soon, but for now, paint, drink, and have fun at home! <3
***** DIY PIZZA BOX EASEL *****
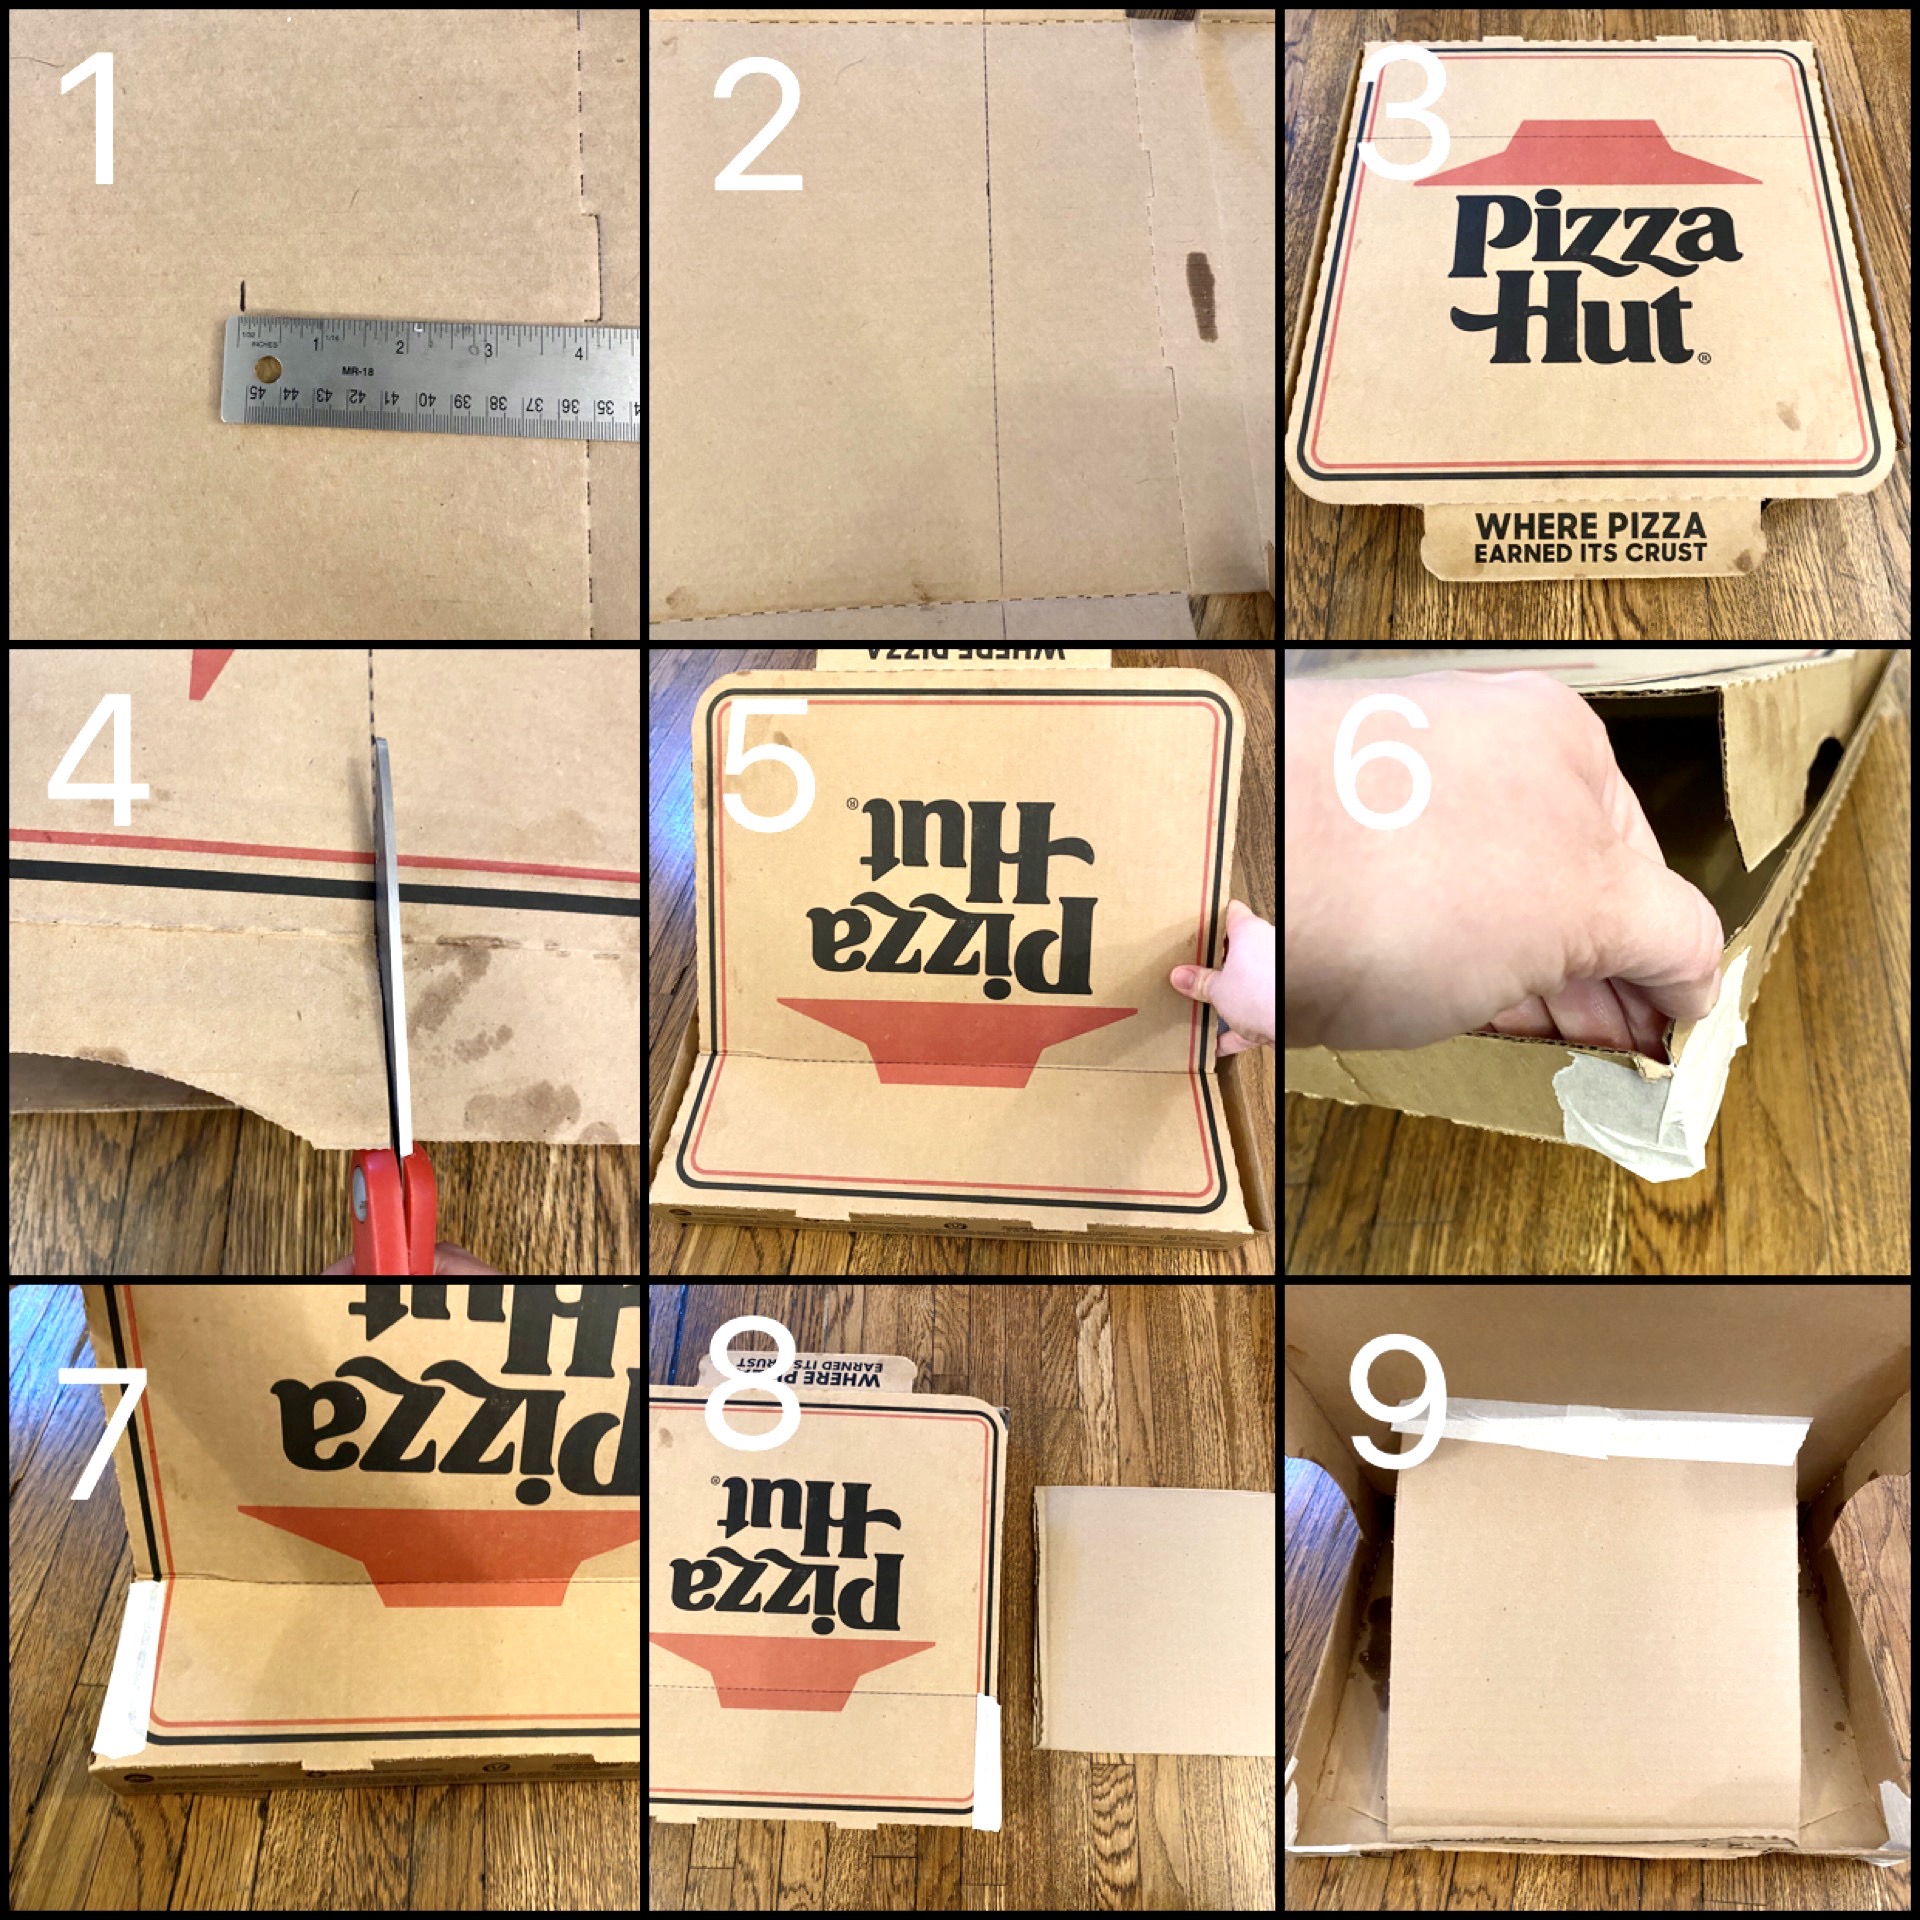
First, open the pizza box and we’ll begin to work inside the lid of the box.
Step 1 (Photo #1)
Measure about 4” from the seam of the lid of the box
Step 2 (Photo #2)
Draw your line from one side of the box to the other (about 4” away from the seam)
Step 3 (Photo #3)
Continue your line from the inside of the lid, over to the outside of the lid
Step 4 (Photo #4)
Use scissors to cut the little section of the lid’s sides to where they meet the flat top of the lid
Step 5 (Photo #5)
-Use a butter knife, or other blade to gently score the UNDERSIDE of the box lid (along that first line we drew)
-Fold the top of the box lid UP where you scored on the backside
(Your pizza box lid is now standing at a right angle
Step 6 (Photos #6 & #7)
Use tape (we used masking tape) to secure any areas of the box you want to stabilize.
-We did the front corners of the box (Pic #6)
-AND the flat part where the scored box lid stays lying down (Pic #7)
Step 7 (Photos #8 & #9)
Take an extra piece of cardboard (Amazon box, or other) and use this for your brace...
Note: Our extra piece of cardboard was a 10”x10” square, cut from a cardboard box, BUT yours can be a little taller or shorter.
*The height of your extra cardboard piece will determine where the angle the back of your easel will fall.
-Tape the extra cardboard piece to the underside of the pizza box top (Pic #9)
AND let the other side of the cardboard piece rest inside the box up against the lip of the bottom of the box (where your pizza was sitting)
DONE! :)
** If you’re trying to take it up a notch and get really fancy with your easel (and have supplies at home), you can paint the box to hide the logo, or use duct tape!
The nice thing about using duct tape is that it’s strong enough to pin back all of those extra flaps on the box lid, AND it comes in a variety of colors and patterns!
___________________________________________________________________________________________
Note: If you’re worried about any germs the cardboard may contain, here’s what we did:
-Washed our hands
-Removed the pizza from the box to a plate
-Disinfected the box outside (hit it with some Lysol spray)
-Washed hands, again
-Enjoyed our dinner and then made our easel!
Share Learn more about our current classes! | Buy a gift certificate

