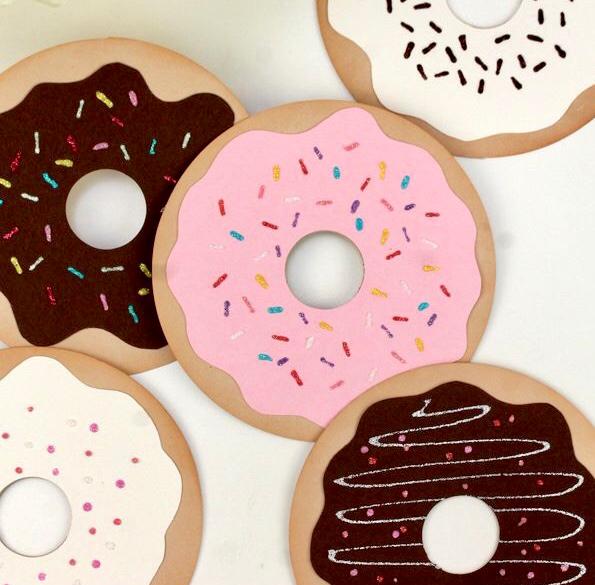
Deliciously Easy Donut Valentines Cards!

Check out these wonderful donut valentines below! They’re so much fun to create and decorate and the kids will LOVE to help with this craft, too!
Enjoy gathering the family together to find your inner artists and make some memories at the same time! There’re so many ways to decorate these little donuts, too, so stop in the craft store (the craft isle of the Dollar Store is a great place to find craft supplies) and grab some fun things to add for toppings! Pass these out to everyone you know! Have the kids take them in to their classmates, mail the to your family to let hem know they’re thought of, or give one to your significant other! No matter who these little gems go to, they’re sure to put smiles on faces and make anyone’s Valentine’s Day, great!
Enjoy!
*****Donut Valentines*****
— MATERIALS—
-Pencil
— 2 sizes of round object to trace (*One for donut size and one for hole in middle)
** If you have a circle cutter or a template of various sized circle stencils, use those! :)
— A variety of colorful paper (cardstock is best)
(*Including: tan, light brown, dark brown, pink, white, red, purple, and others)
— Glitter glue pens (or 3-D paint)
— Glue (liquid glue or glue stick)
— Brown ink pad (or paint) and a makeup sponge
— Envelopes that will fit the large circle size (**Optional)
— DIRECTIONS —
Step 1: Making the donut’s shape and size
-Select the color you want for your donut, such as tan, light brown, dark brown, etc.
-Use the pencil to trace around the circular object of your choice, (great choices are a bowl, piece of Tupperware, or mug)
An ideal size is about 4"
-Use the smaller object to make a 1” circle in the center of the larger one for the donut hole
Step 2: Making the icing
-Select the color you want for the icing, such as white, pink, red, or purple, etc.
-Repeat the 2-circle process from step 1
-Instead of leaving the outside circle round, cut it with a wavy shape all the way around (to look like icing)
-Glue the “icing” to the “donut”
Step 3: Decorating your donut
-Use the glitter glue or 3-D paint (‘Puffy Paint’) to add sprinkles, more icing, or other designs on top of your donut
-Use the brown ink (stamp pad), or paint of any style and sponge to gently apply some darker color around the edges to give it that “freshly baked” look and a little more depth with the shading
Step 4: Personalization
-Once the glitter/3-D glue has dried, you can write your message on the back of the donut and (optional) place it in an envelop to mail or hand out!
ALL DONE!
*Note: This DIY Valentine idea can be credited to ‘Damask Love’ and the original tutorial can be found here:
http://damas...t-valentines/
While you’re in the crafty mood, why not join us for one of our Valentine’s Day classes this month?! We have some excellent love-themed paintings coming up for you to come in and make while you drink wine and listen to music!
*Learn more:
https://www....ycelebration-

