DIY: Create a Faux Finish Wall
Do you have a wall in your house you want to style as an accent wall, but can’t decide on a color or removable wallpaper? Did you ever think you could create your own accent wall? If you’re ready to take the plunge, we have a few steps and tips for you.

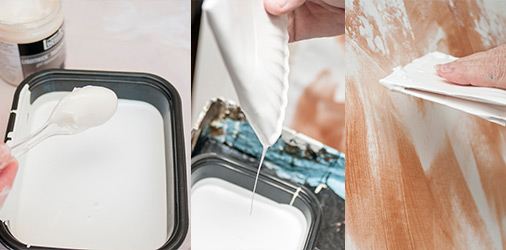
Step 2. Start with a clean wall – free from artwork, nails, holes. Using a chip brush a copper metallic paint, paint clusters of brush strokes all over the wall leaving some white space. The brush strokes should be sporadic, short and in all directions. This will create texture.
Step 3. Pour white paint into a painter’s pan and add 2-3 spoonsful of acrylic thickener and stir until the paint has thickened. Fold a paper into quarters, and dip one edge of the folded plate into the white paint and use a scraping motion in all directions to apply paint to the wall. Start at the top of the wall and work your way down. The paint will appear spotty, thick and uneven. The paint should be the thickest at the top of the wall and become sparse towards the middle, and stop about 2/3 of the way down on the wall.
Step 4. Now onto the color paint! Pour each color into its own pan and stir in thickener to each. Repeat the paper plate scraping process in step 3, but starting with the bottom of the wall working your way up. For a lot of contrast, alternate between the two colors using a different plate for each. For a more blended texture, use the same plate in each color. Continue this process until you have reached the white section, and overlapped about one to two feet.
Step 5. Let’s blend! In the middle of the wall where the white paint and the color paints met, check to see if they’re still a little wet. If they are, grab a new folded paper plate and continue the same scraping motion to blend the colors without having to add new paint. If the paint has dried, don’t worry, you’ll just dip the paper plate into all three colors and scrape across the middle of the wall where the colors have met, and blend! The blended area should be about two to three feet and should transition from light to dark…be careful not to over-blend!
Step 6. Style and enjoy! With this textured wall, I suggest a statement painting like our “Fallen Feather” that can be painted at Pinot’s Palette *wink wink* and then add in some simple and minimalistic wall décor.

